Posts Tagged ‘games’
LibGDX – Making a Paged Level Selection Screen
Welp, it looks like it has been about a year since my last post, so I figured I’d get something up here before a full year went by. Today, I’ll be going over some code I put together to make a paged level selection screen with LibGDX’s Scene2D package. I endearingly refer to this as Angry Birds style, but it’s obviously not exclusive to Angry Birds and has found it’s way into countless games and apps. Anyway, continuing on…
First of all, a screenshot of what we will be making. Note, I am not an artist, so I will just be using the basic skin as can be found in the LibGDX Tests project. You’ll obviously want to use your imagination to make it nicer looking.
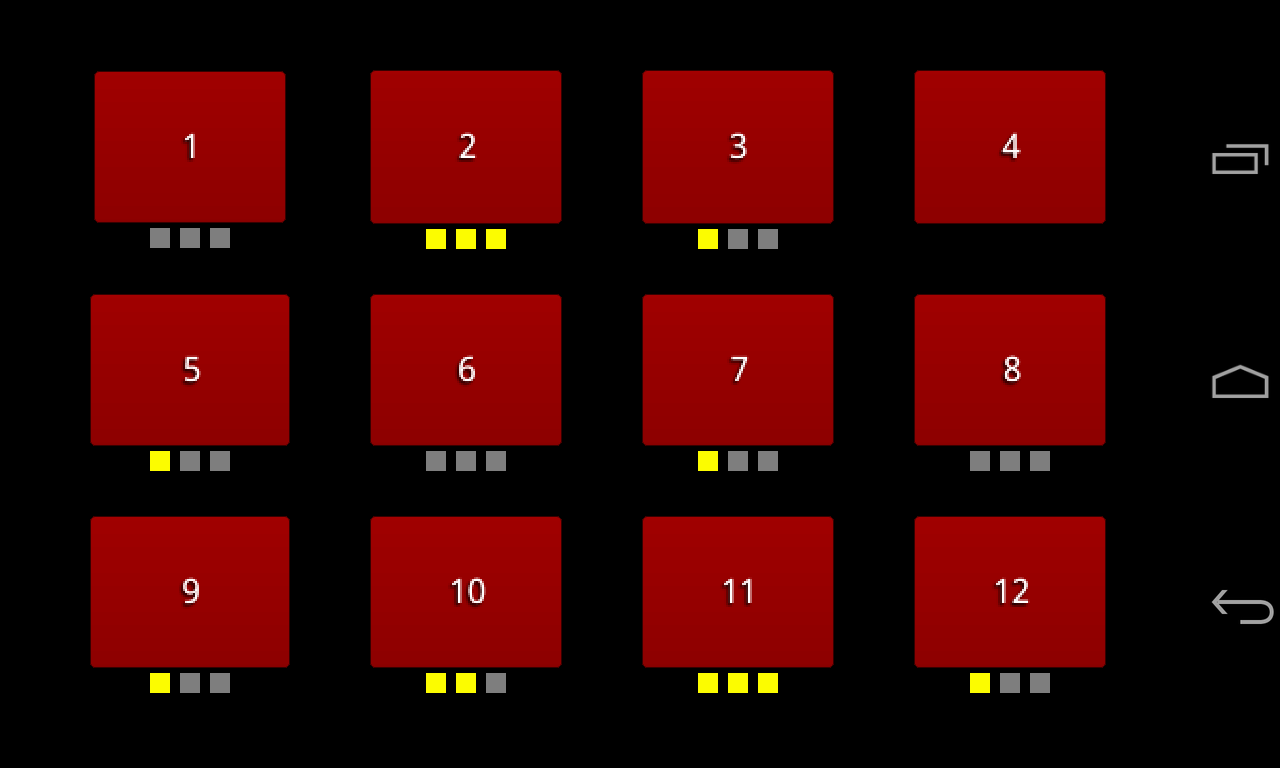
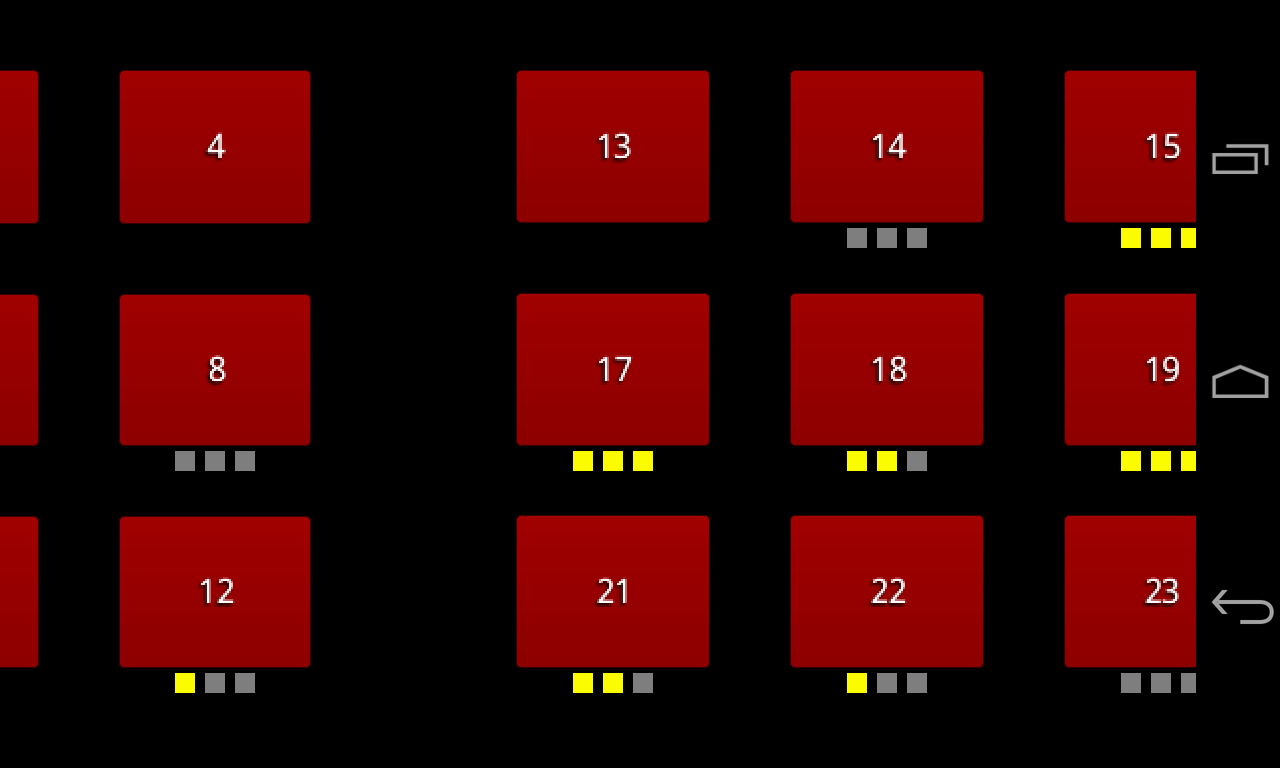
There, isn’t that nice? Still pictures don’t really do it justice but I am on a time limit here so they’ll have to do.
Read the rest of this entry »
Quick Tip: LibGDX – GWT – Mouse Pointer
Today, I was working with the GWT backend for LibGDX and in this particular game I was using mouse drag. I was met with an unsightly text-selection cursor on my mouse. It made me sad, and I bet it’d make you sad too.
Here’s one way to fix that…
The default index that the LibGDX Setup creates is pretty basic, which is good as it makes no assumptions as to what you want. Here’s an example:
<!doctype html>
<html>
	<head>
		<title>lines</title>
		<meta http-equiv="content-type" content="text/html; charset=UTF-8">
	</head>

	<body>
		<div align="center" id="embed-com.mobi.lines.Lines"></div>
		<script type="text/javascript" src="com.mobi.lines.Lines/com.mobi.lines.Lines.nocache.js"></script>
	</body>
</html>
Unmodified, this allows the aforementioned text-selection cursor to appear upon drag operations. If you don’t want that, you can add the following style (to the head) and script (at the end of the body) tags to your index.html:
<style>
	canvas { cursor: pointer; }
</style>
and
<script>
	function handleMouseDown(evt) {
	  evt.preventDefault();
	  evt.stopPropagation();
	  evt.target.style.cursor = 'pointer';
	}
	function handleMouseUp(evt) {
	  evt.preventDefault();
	  evt.stopPropagation();
	  evt.target.style.cursor = '';
	}
	document.getElementById('embed-com.mobi.lines.Lines').addEventListener('mousedown', handleMouseDown, false);
	document.getElementById('embed-com.mobi.lines.Lines').addEventListener('mouseup', handleMouseUp, false);
</script>
In the end, you should have something like this:
<!doctype html>
<html>
	<head>
		<title>lines</title>
		<meta http-equiv="content-type" content="text/html; charset=UTF-8">
		<style>
			canvas { cursor: pointer; }
		</style>
	</head>

	<body>
		<div align="center" id="embed-com.mobi.lines.Lines"></div>
		<script type="text/javascript" src="com.mobi.lines.Lines/com.mobi.lines.Lines.nocache.js"></script>

		<script>
			function handleMouseDown(evt) {
			  evt.preventDefault();
			  evt.stopPropagation();
			  evt.target.style.cursor = 'pointer';
			}
			function handleMouseUp(evt) {
			  evt.preventDefault();
			  evt.stopPropagation();
			  evt.target.style.cursor = '';
			}
			document.getElementById('embed-com.mobi.lines.Lines').addEventListener('mousedown', handleMouseDown, false);
			document.getElementById('embed-com.mobi.lines.Lines').addEventListener('mouseup', handleMouseUp, false);
		</script>

	</body>
</html>
I know, it’s not exactly earth-shattering stuff here, but I hope it can help someone.
LibGDX via AIDE
For quite some time I’ve dreamed of being able to use my Android devices for development. Until recently, this dream seemed like it would never become a reality (at least, to the extent I wanted). Then, I learned of a new app available on the Google Play store… AIDE – Android IDE, an on-device development environment for Android applications. I’m not sure if this is the first app of its kind or not, but it sure seems like it’s the best.
So, what exactly does AIDE do that makes it so awesome? Well, first of all, like any good code editor AIDE offers syntax highlighting. More interestingly though, it provides code completion, refactoring, and other helpful features that traditional IDEs offer (and most on-device code editors don’t). Lastly AIDE, makes it possible to compile and run your application directly without having to use a computer. This is, to me, the most exciting aspect of AIDE.
After working with LibGDX for the last year and a half, I naturally wanted to see if I could use AIDE to continue to do so. My first attempt ended rather quickly with a issue report to the developer of AIDE but they turned around a fix very quickly and I was back in business. Lo and behold, it works!
There are a couple ways to get this set up, but here I’ll describe an easy way to start a new project. I’ll assume we want to maintain the best practice 3+ project setup and, to make it easier, I will utilize the dev-guide demo project from the LibGDX SVN repository on Google Code.
I’m sure I don’t have to tell you this but, to be sure, ensure you have AIDE installed on your Android device (this will work the same on phones or tablets).
With that out of the way, the first step will be to acquire the dev-guide project. I did this right on my device using Open Android SVN but you can use any means you like (Box, Dropbox, and Google Drive are all fine choices, as is copying from your computer). I copied the dev-guide folder to the AppProjects folder that AIDE sets up on the sdcard but this isn’t strictly necessary as AIDE will open projects from anywhere you like. Next, start AIDE, then locate and open the my-gdx-game-android project. We’ll need to make some very minor modifications so it works in the AIDE environment. Open the .classpath file in the project root. Update the references to the shared project and gdx.jar so that they are relative to the project (as opposed to the workspace). At the time of writing, the icons included in the my-gdx-game-android project are broken so you’ll need to replace them. Creating a new project in AIDE is a fine method of acquiring new ic_launcher.png graphics. Just copy and replace the same in the my-gdx-game-android project. Now, we are ready to run the game to make sure everything is correctly setup. Simply choose the Run option from the Menu (or Action Bar if on Android 3.0+). It will take a few moments to compile and install. When it opens you should be met with a nice fuschia screen (You can thank Mario for that one).
Assuming all went well, you are now ready to build out the next big thing. You’re only limited by your own imagination. Well, that and your ability to be productive and creative on your Android device. Perhaps, I will do another post with some apps I’ve found useful in that regard.
So, to recap, the steps are:
- Acquire AIDE
- Acquire the dev-guide project from Google Code
- Update the classpath
- Replace the icons
- Run
- ???
- Profit
Update:: I’ve fixed the icons in the LibGDX SVN, so that step should no longer be required.